

How do I add a Google Form?
Adding a Google Form to your Experiences lets visitors easily submit information to you (for promotions, feedback, etc…) and once submitted, you will have access to that user data within your Google account.
The first step in adding a Google Form to your 42Kites Experience is creating the Google Form. If you’ve never created a Google Form before, HERE is a link to the official Google tutorial video.
Add all the form fields you want your form to have and once it is complete click the Publish button in the top-right corner of the screen:
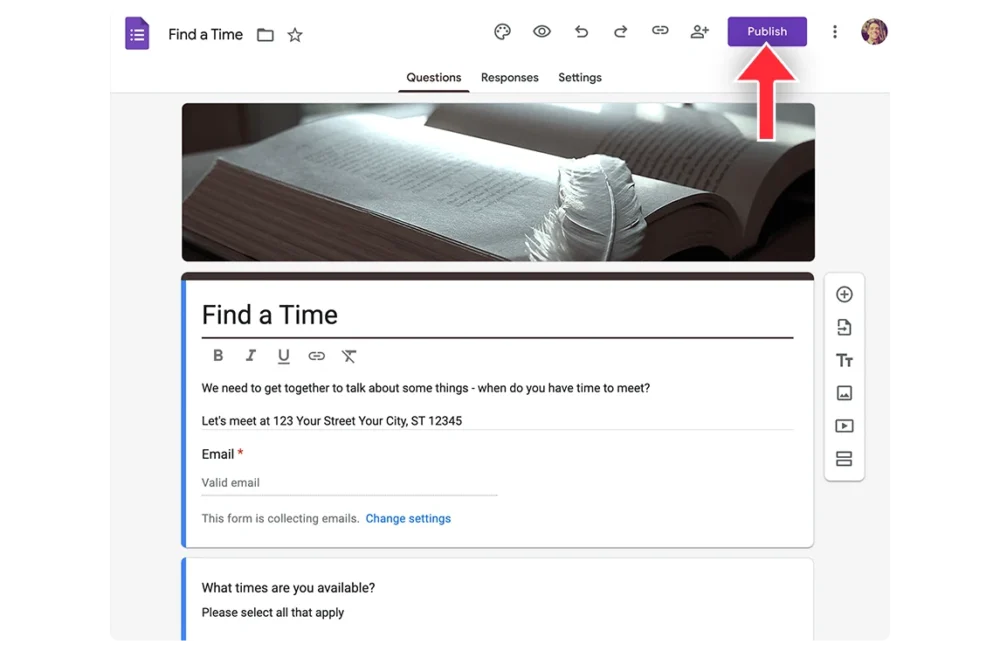
That button will now change to “Published”, now click the three vertical dots, then click Embed HTML, then click the Copy button, like this:
With the embed code copied, login to your 42Kites account and create a new Experience or edit an existing Experience.
On the Experience screen, you will see a box labeled Add New Content. In that box is a dropdown menu with all the different types of content you can add. Click into that dropdown menu and select Form and then the fields for adding a Google Form will appear.
At the top you’ll see a big box that is essentially a text pad in your browser, this area is there to help you extract two things from with the embed code you just copied.
Tip: Anything in this large box does NOT get saved anywhere, so don’t worry about leaving content in this box.
If you are comfortable pulling out pieces of code, the video below shows you how where to find the Form ID and the Height of the form and where to enter that information:
If that video is not helpful to you, follow the instructions below or submit a ticket and we’ll take care of it for you:
In your 42Kites Experience editing screen, once Form is selected, Click into the big box and delete the default text then paste the Google Form embed code that you just copied from Google Forms.
If you look towards the bottom of the code you pasted you’ll see height=”X” where X is an actual number. You can see the value in our example code below, it’s 1641 (but yours will be different. Copy and paste or manually enter those numbers (not the “”) into the Height box near the Save Content button:

Easy, right?
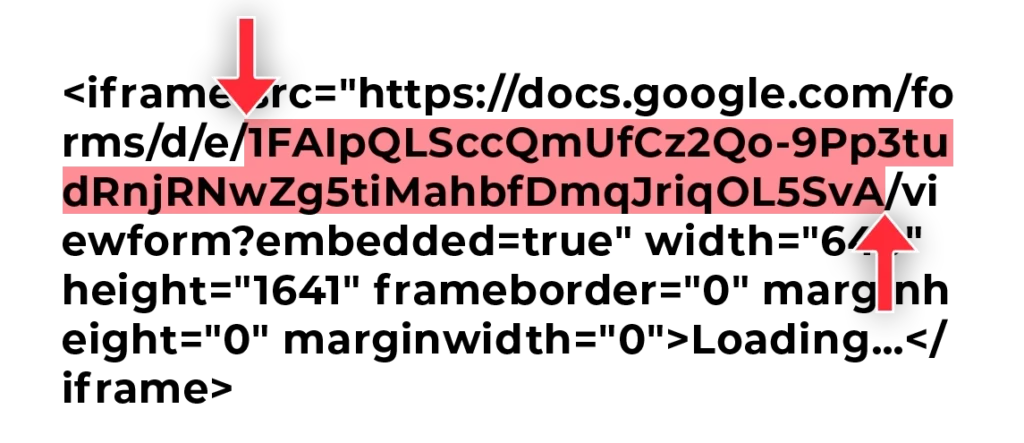
The next piece of information that you need is the Form ID contained within that embed code. This is a little bit harder to find so here are a few tips:
- It can be found towards the top if the code
- It starts after the /d/e/
- It ends at the following slash (usually on the next line in the code)
- Do not copy either slash (at the beginning or the end)
You can see our example Google Form ID highlighted below:
Copy and paste yours into the Google Form ID field, like this:

The last thing to do is to click the Save Content button and your Google Form will now be embedded in your Experience.
NOTE: Depending on the form fields you added to your form, you might need to adjust the Height number. After you save your form, check the Experience on your mobile device and see if the bottom of the form is getting cut off, if it is… increase the Height number and check it again. This sometimes happens because Google does not take into consideration long form fields on mobile devices.