How do I install the SmartLink Card Holder?
Introduction
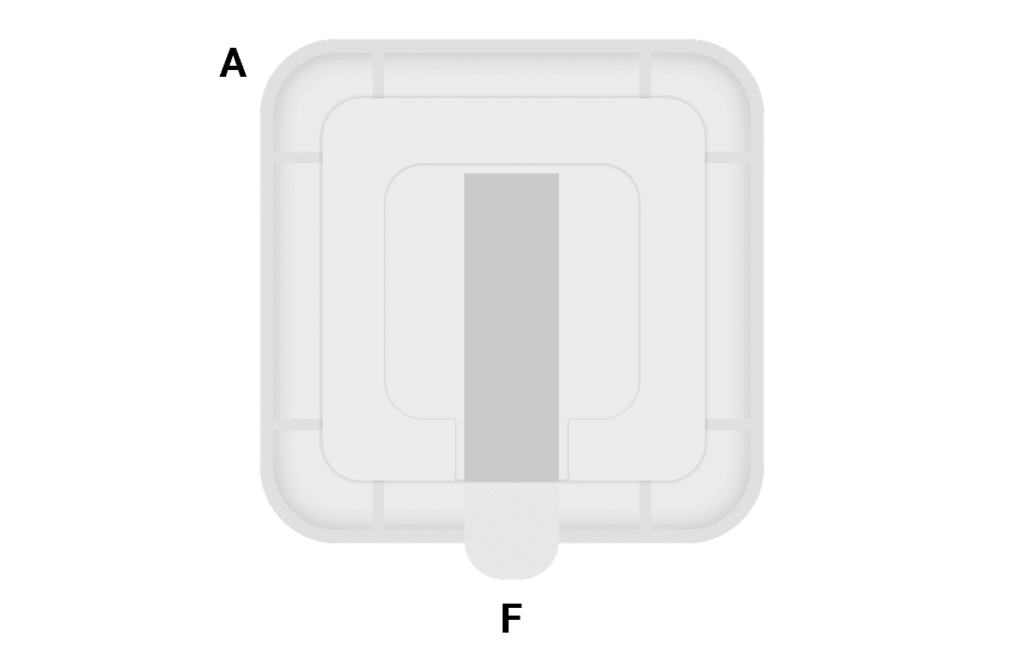
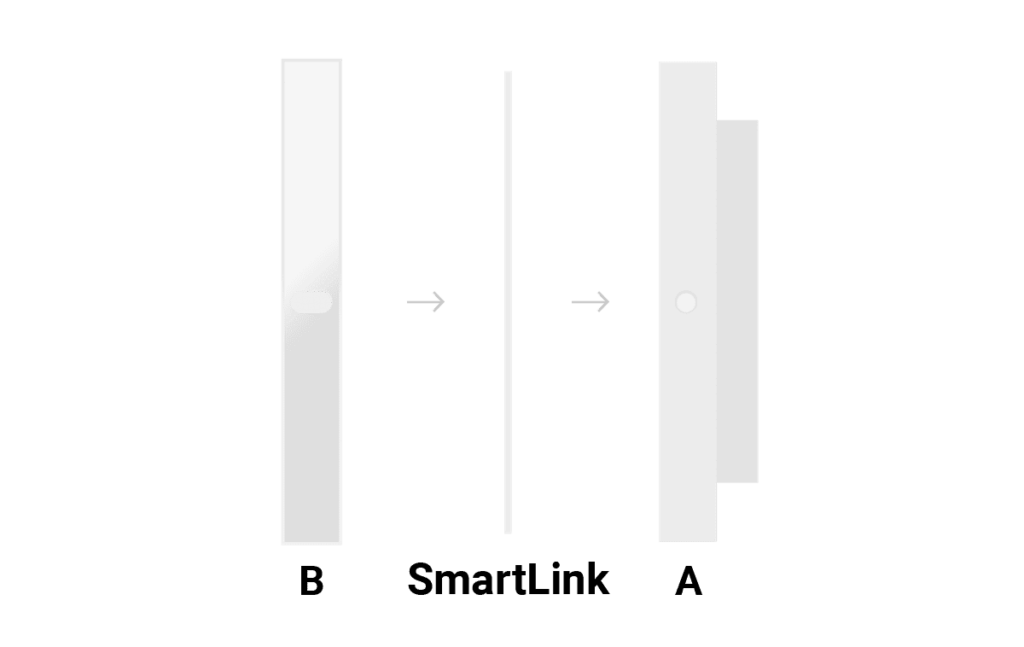
Installation of the 42Kites Wall-Mounted SmartLink Holder should only take a few minutes and requires a small screwdriver and a large screwdriver (or power screwdriver). Each wall-mounted holder is made up of three pieces, four screws (two small, two large) and one adhesive strip:
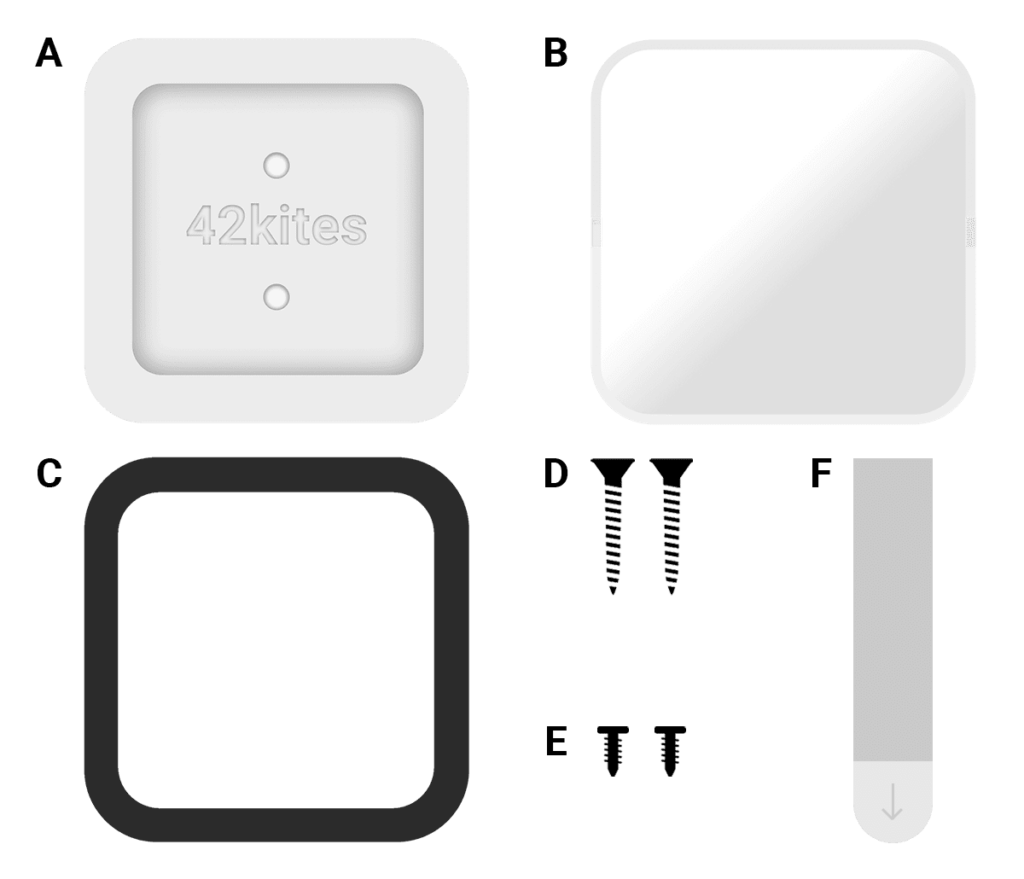
- Part A: Base (white, hard plastic)
- Part B: Windshield (clear, hard plastic)
- Part C: Wrap (dark, silicone)
- Part D: 2 X Large Screws (these attach the Base to the wall)
- Part E: 2 X Small Screws (these attach the Windshield to the Base)
- Part F: Adhesive Strip (alternative to Part D if you don’t want to make holes in the wall)
The three steps to installing the device are well documented below. If you’re more of a animated GIF person, this is for you:

Step 1
The first step is to decide where you will be mounting the holder on the display (centered OR left/right). Depending on the size and shape of your display you might want to mount it below or to the side of it. For example, if you are mounting it near a painting we recommend either mounting it below (centered) or to one side (aligned to the bottom). The mount should not be touching the display, it should be a few inches away.
Before you make a final decision on this, walk around your space and place the Base (Part A) in each position near each display to see which position is the best for ALL your displays.
Tip: You can also use our Augmented Reality App for this.
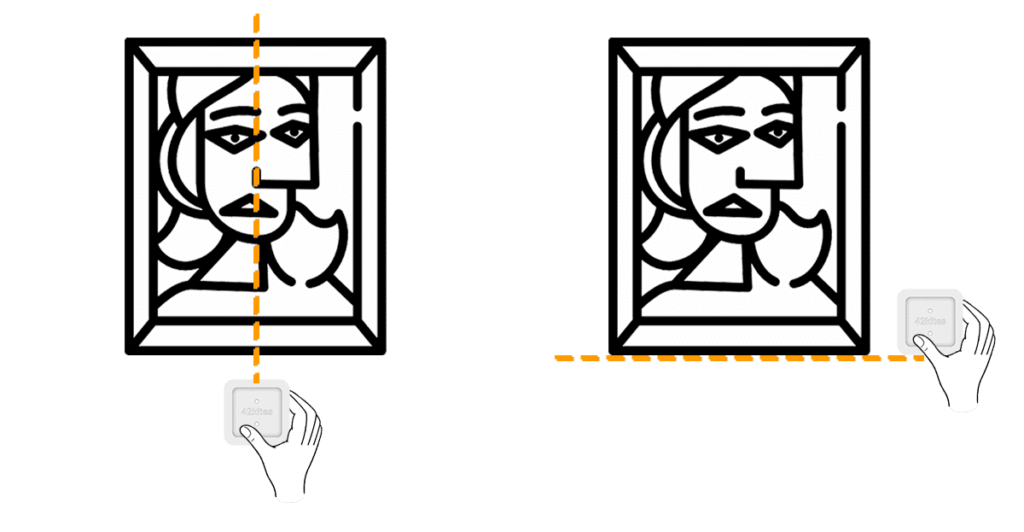
Maintaining a consistent placement of the device across all your displays (if possible) will ensure that visitors know where to find it as they walk around your space.
Once you’ve decided on where the devices will be located, start with the first display and place the Base where you want it and screw the large screws (Part D) in both holes (above and below the 42Kites name) and into the wall. Do not tighten these screw so much that it breaks the plastic piece. Tighten it just enough so that it feels solid attached to the wall.
Note: If you want to use the adhesive strip to attach it to the wall, scroll down to the bottom of this page for information about using the adhesive strips.
Step 2
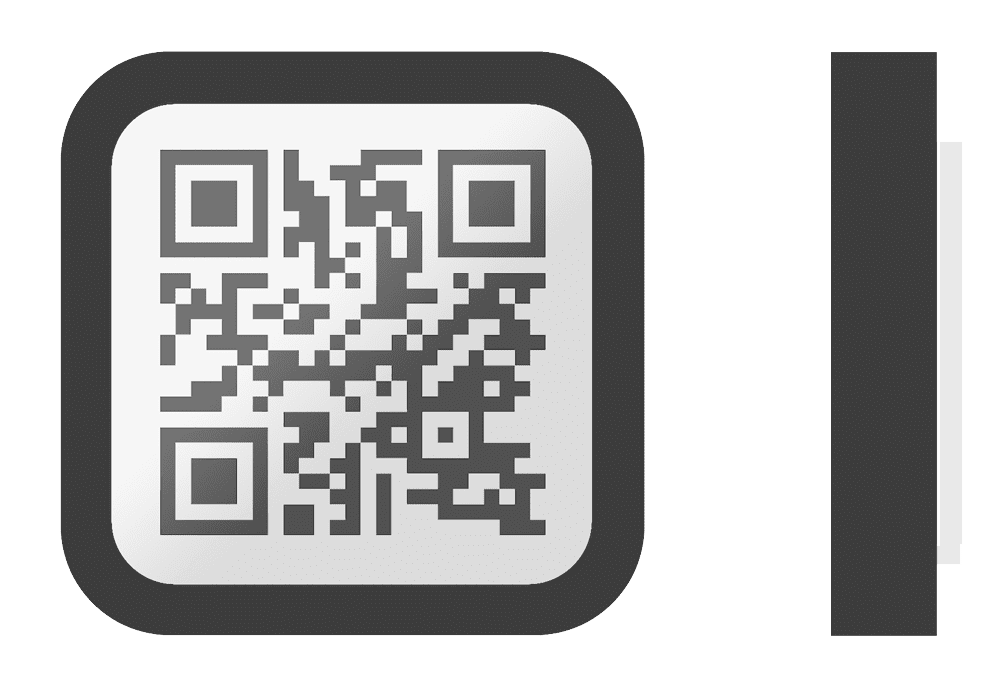
The next step is to configure your SmartLink Card to link to the Experience that matches your display. If this is your first time doing this, please follow THESE INSTRUCTIONS.
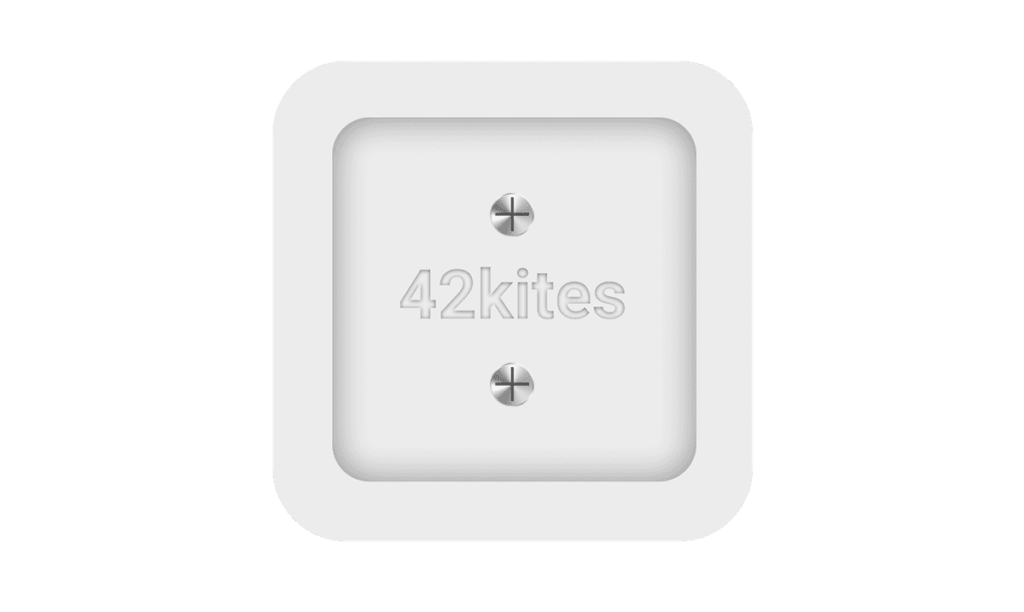
Once your SmartLink Card is configured, place the Windshield (Part B) over the Base and SmartLink card, make sure the screw holes on the Windshield are on the sides (and not the top).
Step 3
With the Base, SmartLink Card and Windshield all together, screw the two small screws (Part E) into the side so that they go through the Windshield and into the Base. Do not screw these small screws all the way in, only screw it in far enough to stop the windshield from being able to slide off.
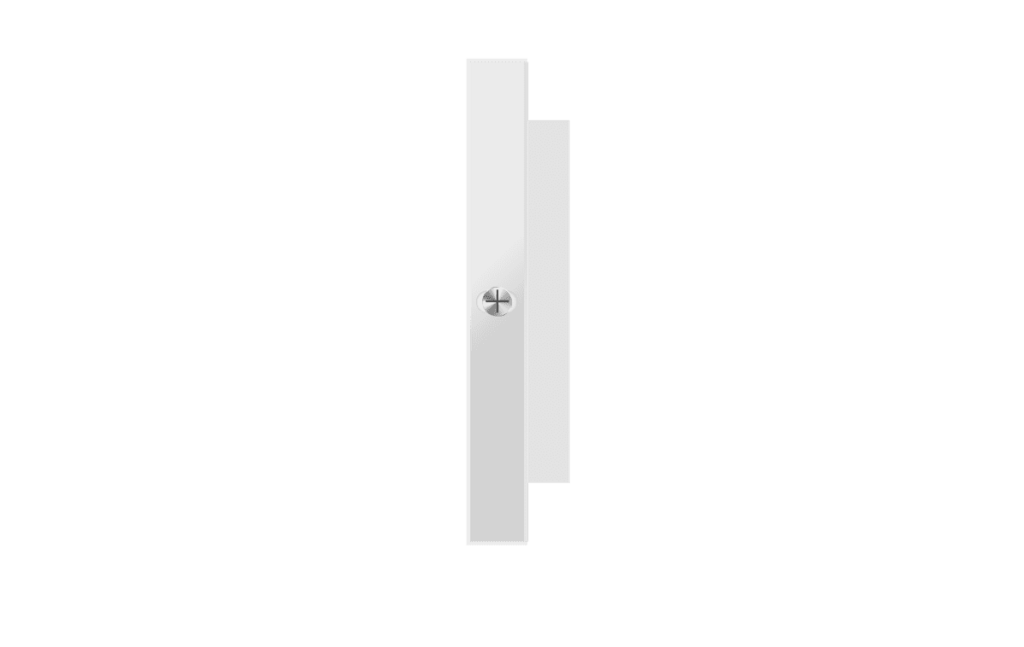
The last piece is the silicone wrap (Part C), stretch it over the device on the wall and make sure the edges are overlapping on all sides and are not bunched up. The end result will look something like this:
Repeat for all the wall-mounted holders and displays in your space.
OPTIONAL: Adhesive strip
If you do not want to put holes in your walls (understandable) you can use the included adhesive strip. The back side of the Base (Part A) has a small indentation where you can attach the adhesive strip vertically. We recommend removing the adhesive covering on one half the strip (keeping the two pieces together) and sticking it in that space on the device. Then remove the other half side of the adhesive covering and stick the device on the wall where you want it.
Make sure the pull tab is not sticking out (down) too much so people don’t grab it.