

How do I sell something / collect money from visitors?
If you want your visitors to easily pay you for something (t-shirt, donation, tickets, membership, etc…) follow these instructions and you’ll learn you how to create a button that links to your payment system.
Get the payment URL
In this tutorial we’ll use PayPal but the process is similar for most other payment processors. There are many different types of ways you might want to collect money and we’ll show you how to set up each of them and to do this you need to get to the Business Tools screen in PayPal. Follow these instructions:
- Login to your PayPal account
- Click on Business Tools in the main menu
- Scroll down until you see the option for PayPal buttons, click that and then click the Get Started button. Your screen should now look like this:

There are many different kinds of buttons you can create and the next step is for you to decide which type of payment you want to accept. Here are a few options with instructions on how to set them up:
One Time Pre-defined amount (for a T-Shirt, Event Ticket or a Book)
- Click on the Buy Now option
- Enter in a name for this item (like “Red Logo Shirt” or “Christmas Eve Event Ticket”)
- Add the price for this item
- Click Create Button (bottom)
- Jump down to the Copy The Link section on this page
A User-defined amount (One Time OR Recurring)
- Click on the Donate option
- Click the Create A Link option
- On Step 1 you can choose to display your log, add an image or message (these are all optional), click the Continue button
- On Step 2 you can customize the details like currency, amount, option to make it recurring and more (these are all optional), click the Continue button
- On Step 3 you can add options to your payment page like letting the person send you a note, get mailing address and more (there are all optional), click the Finish button
- Click the Shareable link option
- Click the Copy button to copy your shareable link to your clipboard
- Jump down to the Copy The Link section on this page
Recurring Pre-Defined Amount (for an Annual Membership)
- Click on the Subscribe option
- Enter in a name for this item (like “Acme Museum Membership”)
- Add the price the person should be billed each cycle
- Enter in the billing cycle (for a membership, it’s usually 1 Year)
- Click Create Button (bottom)
- Jump down to the Copy The Link section on this page
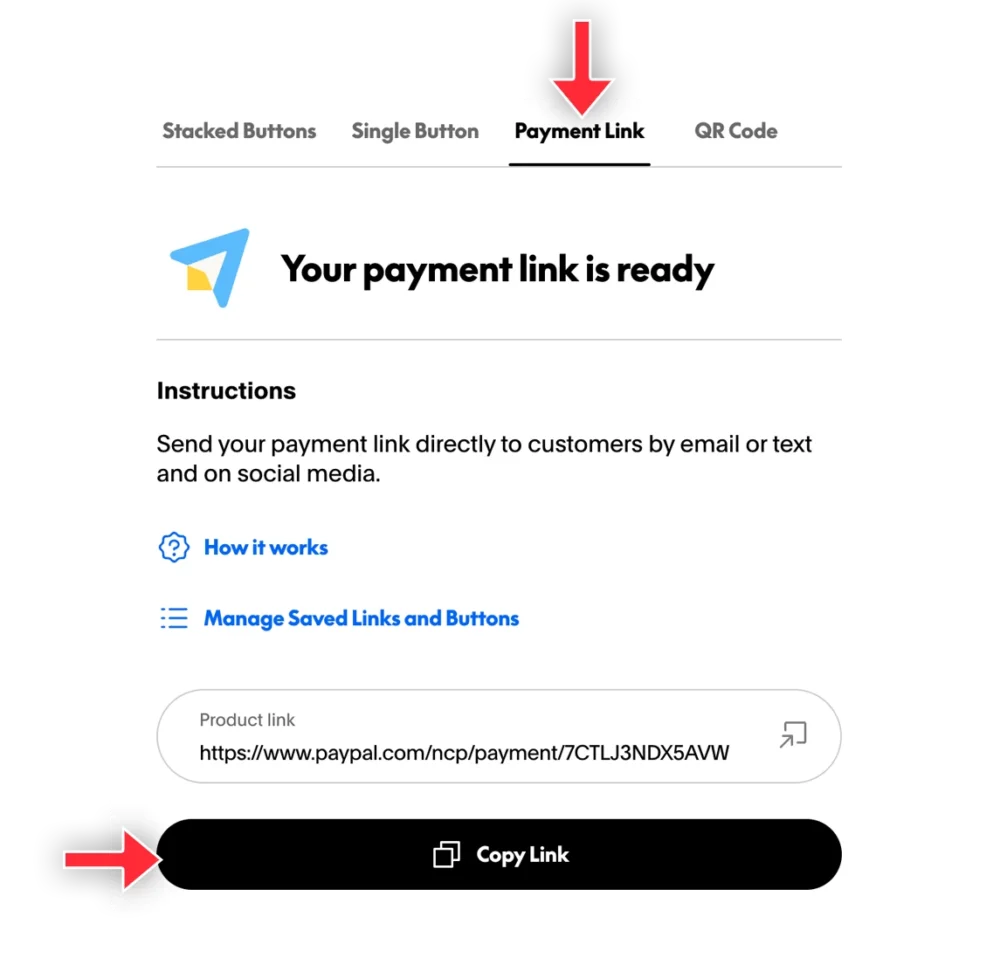
Copy The Link
Once your button settings have been saved, you’ll be presented with many options for displaying/sharing your new button. Click the Payment Link option at the top, then click the Copy Link button at the bottom.
Add The Link
With the payment URL on your computers clipboard, now it’s time to add that payment link to a button.
- Login to your 42Kites account
- Add an Experience OR edit an existing Experience
- Click Edit as Admin
- Scroll down to the Add New Content box
- Select Button
- Select Link to a web page
- Enter the text you want on the button (like “Buy a Ticket” or “Donate Now”)
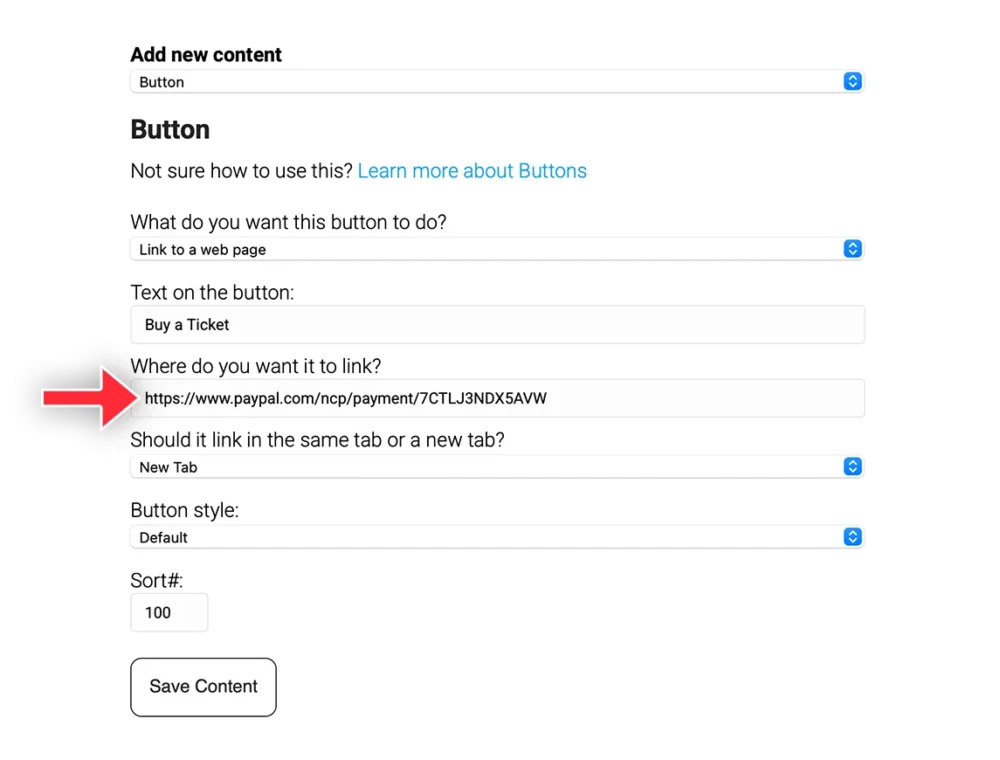
- The most important step -> In the “Where do you want it to link?” field, paste in the URL you copied from PayPal
- In the “Should it link in the same tab or a new tab?” field select New Tab
- The end result should look like this:
Now click the Save Content button and your Experience will display have a button that links to your payment processor!